Thursday, August 26, 2010

Water Color Painting Class #4- A Study in Strawberries...

We learned a totally new technique of water coloring this class.  It was wet on wet.  I also got to finally break open and use my new bottle of masking fluid.  Oh boy! Oh boy!  Now we're having fun!

First we sat in front of the computer and discussed the 5 varies of shading to make something appear 3 dimensional on paper.  I must have picked up more in the University of Utah open draw than what I thought.  All of my years of pencil drawing were paying off.

Then, we were drawing a strawberry from a black & white photo on the rough side of the water color paper.  Then it was fun with masking fluid.  I got to break open the new package on this one.  It was a mini version of Christmas.  I finally get to play with and figure out what this masking fluid was used for.  Yahoo!  Colleen, the teacher told us to just lightly put/ poke the paper to make some strawberry seeds on the dark side of the strawberry; about 5 seeds would do.  Don't over do it; she told us.
(Photo- my monochromatic strawberry study.)

We turned the drawn and masked drawing face down on our boards.  We took water filled sponges and squeeze water out on to the paper.  More and more water; we squeezed onto the paper.  Pushing the water with the sponge into the back of the paper.  Then, we flipped the paper over.  More water was squeezed on to the front of the paper.  This side we needed to be careful not to disturb the drawing or the masking.  We carefully dabbed more and more water into the paper.  The goal was to raise the paper off the board and have it sag easily in you hand.  Once that occurred, then we started to sop up all the water off our boards and all of the excess water off of the paper.  Then with a rolled up dry tea towel, we rolled it across over the paper on both sides trying to get all of the excess water out.  It seemed a little counter to what we had done.

Once that was done then we chose one color and did the strawberry in a monochromatic form.  The idea here is that we first need to figure out how to make it three dimensional then we can do it in color once we discover where our darker and lighter values were.  I decided to use a mix between paines gray and ultra marine blue.

( Photo- My colored study of the strawberry.)
Next, we did it in color.  I played with all kinds of color in the background but kept to mainly strawberry like colors for the actual colored strawberry.  Yeah, it might have been a little boring of me.  One of the gals in the class did a wonderful dual colored strawberry with a cool red and a wonderful warm burnt sienna.  It was wonderful!  Another gal did a red with shades of purple that turned out quite nice too.

Thursday, August 19, 2010

Water Color Painting Class #3

How time flies I'm all ready into my third class!  AND here's a painting that I did between classes... (A bit of homework).  Kind of a stormy clouds in background with trees.  It's based on a photo that our teacher gave us in the prior class.  Though, I will say the sky turned out to be darker than what I thought it would.

We started out the third class with watching a photo slide show and discussing composition in a painting.  It was very informative, and hopefully will help in my paintings overall.  It makes me want to go over all of my other paintings and see what I did right and what I did wrong.  Hopefully, I have more right than wrong.  After the slide show we proceeded into landscapes/over layering painting.  This we did over paintings we had all ready done in class.  I chose one of the washes that I did in my first class.  Here's the result....

This is supposed to be a field with pumpkins with the mountains and trees off in the distance.  It still needs some work.  But I think I'm seeing some progress?

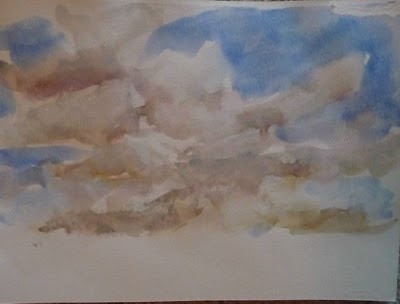
Next the teacher had us work on stormy clouds in a different way.  It's like starting with a wash then putting turning the paper so that its vertical in one direction and then turn over the other way vertical before it drips off the paper.  Then mix in some gray and work it in a bit.  Put in the clouds with a clean moist brush picking up the paint.  Then turn the paper vertical one way then the other to allow the paint to work into those clods giving them more a fuzzy stormy look.  Well, I will say I was REALLY horrible at this exercise!  Here's what I ended up with...


Then we got to learn how to do evergreen trees.  These were rather fun and I experimented with several different size brushes on this same sheet of paper.  What do you think?


Thursday, August 12, 2010

Water Color Painting Classes- 1 & 2

I've muddled my way through two water color painting classes so far.  Last night, I had my second class and I feel like I'm still just barely dipping my toe into it.  It's definitely a learning curve and I'm hoping that my learning curve improves as I go along.  The first class we worked on washes and then we played with making clouds.  My clouds need some work and I'm rather amazed that water colors dry SO MUCH more lighter.  We took some of the paintings from the first class and used them again for backgrounds in the second class.   I guess that this is fairly common way of doing water color paintings in that you layer them.  You paint one segment.  Then, let it dry and paint another and so on. The teacher had us hold on to all of our paintings because we are going to still use some of them for landscapes for future.  Below are the photos of my water color paintings.  I'm documenting this because I'm curious to see how my water color painting progress.

Class # 1-- WASHES & CLOUDS


Class #2-- TREES & STORMY SKIES

( I do think that this stormy sky looks pretty good. -- Perhaps, there's hope for me yet?)

Wednesday, August 4, 2010

Starting Water Color Classes...

Tonight I'm off to start learning the art of water color.  I've attempted this art form before but it came out as a watery mess of colored blobs on a sheet of paper.  I'm hoping that I can figure it out with the help of classes.  I'm taking classes from a gal that I met through my former oil painting teacher.  Her name is Colleen Reynolds.  Keep your fingers crossed and I hope to have some successful pictures of paintings to share with you in the near future.